3. Syncing the tagwall
To persist our messages we need to save them somewhere. One option would be localstorage and using an ember-addon like ember-localforage-adapter which works great. If you did this, you’d have the first steps laid out for an offline-first application. But it’s still offline and we’re lonely, we want to talk to other humans. We need to synchronize our data online and we’ll be using Firebase to do it.
We will:
- Create a
messagemodel using Ember Data - Use actions up, data down
- Use Emberfire to bridge Ember and Firebase
The message model
Models are the objects that represent your data. You define what kind of data you would like to store. For our message model we’ll define two properties: text, and created:
ember g model message text:string created:date
For the created we can set a default value so we don’t have to save a date every time. Edit app/message/model.js
import DS from 'ember-data';

export default DS.Model.extend({
  text: DS.attr('string'),
  created: DS.attr('date', {
    defaultValue() { return new Date().getTime(); }
  })
});
As Emberfire automatically adds IDs to models, we shouldn’t define any ourselves. You can read more about creating and deleting models on http://guides.emberjs.com/v2.1.0/models/creating-updating-and-deleting-records/. But components should not be used to create new records. That’s what routes are for.
Data down!
Right now, when a message is sent, we push a plain JavaScript Object (and not a real Ember.js model class) into our messages array in the component. This is the lo-fi version. What we should do instead is pass the data down from a parent route. The route is responsible for fetching data and passing it to our component. Since our component is currently in the app/index/template.hbs we will request our models there:
import Ember from 'ember';

export default Ember.Route.extend({
  model() {
    return this.store.findAll('message');
  }
});
This is Ember Data’s way of sending an ajax request to the server to fetch all messages. More on that here: http://guides.emberjs.com/v2.1.0/routing/specifying-a-routes-model/. The route’s model hook returns a model which is automatically set on the controller, which in turn makes it available in our templates. This works even if you don’t define a controller, because Ember autogenerates it for you.
We also need to pass the model to our component:
{{tag-wall messages=model}}
If you refresh the browser now, you’ll see an error in the console as it tries to fetch the messages GET http://localhost:4200/messages 404 (Not Found). Right, because we don’t have a backend connected yet. This is where Firebase comes into play but let’s complement the data down with actions up first.
Actions up!
Components are supposed to work alone. The tagwall isn’t supposed to know anything about our models, how we store, create or save our data. See more about sending actions from components to your application. Now our tagwall is it’s messages from the route’s model, good! But it’s still changing the data by creating new messages directly in the component, bad!
Instead the component should notify the application through an action to create a new message. This is data down, actions up. I know it took me some time to understand so allow me to repeat: Currently our component has a single action called submit which saves a new message. Components shouldn’t change data. Instead we are going to change the submit action on the component to check that we never save an empty message and afterwards sending the actions up. This allows us to catch the action on the route. called saveMessage.
submit does a little check to make sure we never save an empty message. If there is a message, we send the action upwards for the route to catch. Note how no data is changed at component level. saveMessage on the route is in charge of creating and saving the message.
Add the sendAction at the end of the submit action in the component:
actions: {
  submit(text) {
    if (text.length < 1) {
      return false;
    }
    this.set('newMessage', '');
    this.sendAction('onSubmit', text);
  }
}
So when sendMessage is called in our component, it checks whether there is a text to send, and if so, it will send the action up using the name onSubmit with the text as value for the action. The idea is that component only cares about the interaction. This is why we send the action up, so a parent can handle whatever logic is specific to our app. In this case, when the component fires ‘onSubmit’ we want to handle it with a saveMessage action on our index route.
Which actions triggers which action is defined directly on the component, like this on app/routes/index/template.hbs:
{{tag-wall messages=model onSubmit="saveMessage"}}
And on app/index/route.js the action itself:
import Ember from 'ember';

export default Ember.Route.extend({
  …snip…
  actions: {
    saveMessage(text) {
      const message = this.store.createRecord('message', {
        text: text
      });
      message.save();
    }
  }
});
Great! We have now completely seperated our concerns. The tagwall component can submit a message but it’s up to the application itself to take further action.
But there’s still an error because we’re trying to save a model without having defined where Ember Data should actually save it.
Emberfire
Let’s sync our site with a Firebase database. We should create a Firebase database and configure the Emberfire adapter, which bridges Ember Data and Firebase. That’s the beauty of this combo, we almost don’t need to change any code to change the backend.
Head to firebase.com, sign up and create a new ‘app’, as they call it. You’ll get an URL like my-name.firebase.io. Remember it.
Now install the emberfire addon. Press ctrl+c in Terminal to stop the server we started earlier and run:
ember install emberfire
This will install the Emberfire module from NPM and add any dependencies to our bower.json as well. This way you don’t have to include ANY script yourself. The addon automatically hooks into ember-cli.
As it will tell you, you need to configure your Firebase URL in config/environment.js. Do that now, please.
Alright, notice how a app/adapters/application.js was created for us by Emberfire? In Ember Data, the adapter is what tells us how to communicate with the backend. Meaning when you use the save() method on a model, it knows where to send all the ajax requests because of the Emberfire adapter.
Open the server again using ember serve and try to send a message in our app. Just as before, ’saveMessage’ will call .save() on the model, which will tell ember-data to sends a request to the server through emberfire and finally land in Firebase.
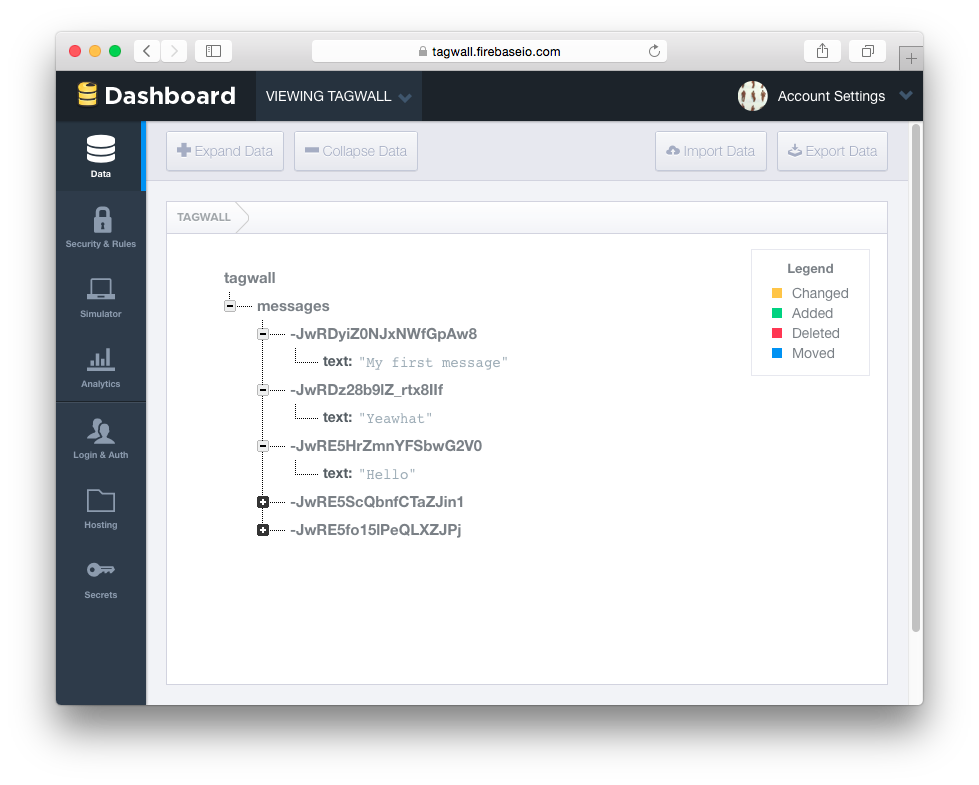
So, there we have it! If you create some messages and refresh, the messages should now properly save and sync to our new remote database. Better believe it! If you open your Firebase account it’ll look something like this:
Next steps
The tagwall is now working, you can send messages and they are stored in Firebase. If not, please let me know at oskar@rough.dk and I’ll try to help.
If you deploy it (see chapter 1 again) or go to my example at tagwall.surge.sh we can have a chat through a version of the tagwall you just completed.
Here are some improvements we could do:
- Make it possible to edit/delete messages
- Introduce a
usermodel so people can identify themselves - Add styling in
app/styles/app.css(or with ember-cli-sass) if you prefer — it could make sense to style the input fixed at the bottom and limit the height of our messages withoverflow-y: scroll;
And what if visitors could create new tagwalls themselves and decide the URL? This way people could create their own (secret) tagwalls to share. We could even use it as a mini-forum for this article. This is what we’ll do in the upcoming chapter four.